The Mercedes master cylinder that is usually used for Mercedes vehicles are manufactured by Girling, ATE, and Bendix. These master cylinders utilized two or three-chamber reservoirs, a level sensor contact built into each chamber. In times when brake fluid level is low or when there is pressure differential between two brake circuits caused by loss of fluid in either circuit, a warning light is activated.
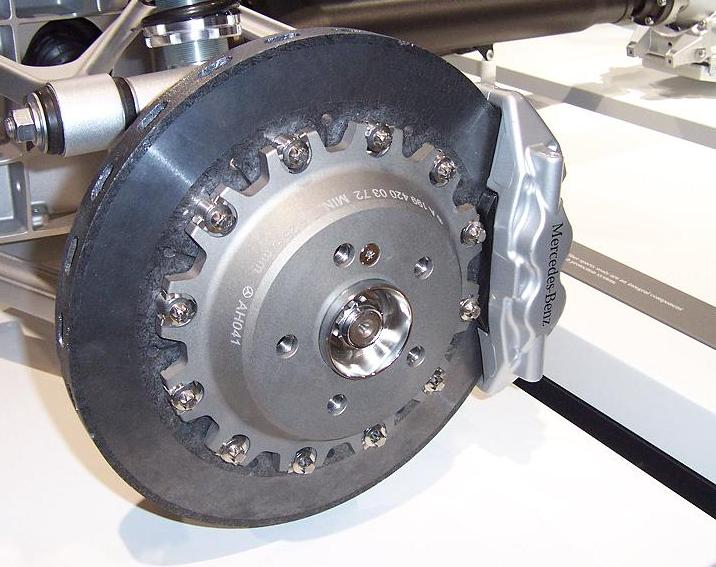
The series 190, 420, and 500 make use of floating type front disc brake calipers while the other Benz models especially those with parking brakes and are cable actuated in rear brake rotor calipers utilizes non-floating type. All Mercedes cars have brake pad wear indicators and differential pressure warning indicator. The 420 and 500 series have inner pads only while the Anti-Lock Brake System is offered as a standard feature on the 420SEL, 300 and 560 series and optional for the 190 series. For the diesel models a vacuum pump is incorporated to provide vacuum to the power brake unit. Adjusting Pedal Height The height of the pedal measured from pedal pad to pedal stop should be 150mm.
To get the correct pedal height adjust the loosen lock nuts and turn stop light switch afterwards tighten lock nuts and pedal free play 5-15 mm. Above the brake pedal is the stoplight switch, loosen lock nuts and adjust switch in such a way that the contact button extends 6-8mm and then afterwards tighten lock nuts.
Parking Brake
1. Before raising the vehicle it is best to remove only one lug bolt at each rear wheel.
2. Try to rotate wheel until lug bolt hole is positioned over parking brake adjuster at an angle of 45 degrees forward for diagonal swing axle and 90 degrees forward for diagonal swing axle with starting torque compensation. And remember that parking brake must be adjusted if the brake pedal can be depressed by more than 2 steps of 6 without any braking effect. Try not to try to alter screw on parking brake intermediate lever since these screws are for balancing cable lengths only.
3. using a screwdriver inserted through the lug bolt hole, hand turn the adjuster until rear wheel can no longer be turned, back off the adjuster until it can be turned without the dragging the wheel.
Checking the Brake Warning Light
1. On the dash is mounted a dual warning light, try to turn the ignition on. Normally you will see a light glowing once parking brake lever is pulled tone notch and goes off when brake lever is full released.
2. To test the circuit warning sensor, again turn on the ignition, release the parking brake and make sure that the light is off. Open the bleeder screw on one wheel and depress brake pedal and the light should light up.
3. Close the bleeder screw, refill the brake fluid and bleed system. Make sure also that light goes out after testing and if the light didn’t turn off then the differential pressure pin of the Mercedes brake master cylinder should be reset.
No comments:
Post a Comment